Do you want to search in all categories or in this category ?

In the main navigation, click on E-signing and then Start flow in the top right corner.
In the main navigation, click on Flows and then Start flow in the top right corner.
In the main navigation, click on Documents, select the document you want to send out for signing and click on Start signing.
All 3 options will lead you to the same page where you will get an overview of all the documents that haven’t been included in a signing flow yet:
The next step is to select all of the documents you want to include in your signing flow by checking them in the list.
If you choose the 3rd option as described above, the document you selected will already be checked in the list, but you can still select other documents as well.
Once this is done, click Next to continue the signing flow.
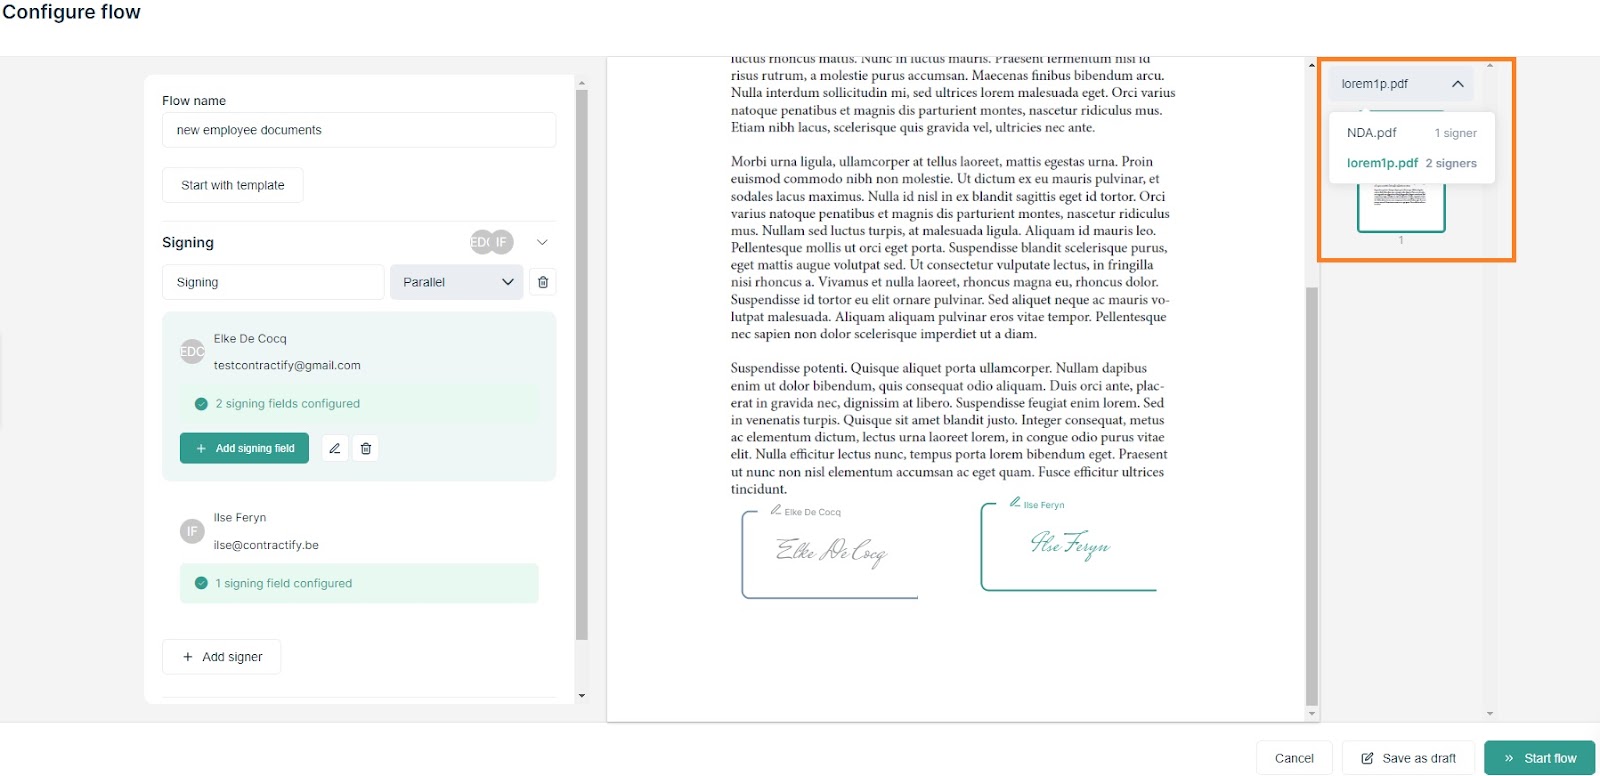
By default, the flow takes the name of the first (or only) document you included but you can rename it to something that better describes the goal of your flow.
Example: If you are sending out multiple documents to sign to a new colleague who will start working at your company like a contract, a car policy, work regulations an NDA, etc., you could name the flow ‘New employee documents’.
Now you are ready to add the signers for each document and determine where their signatures should appear.
Depending on the licence tier of your Contractify subscription and the settings you defined for the e-signing module you will see 3 different possibilities:
1. You have a Lite subscription and don't require legal approval to send out documents:
In this case you can immediately proceed by clicking on Add signer.
2. You have a Lite subscription and require legal approval to send out documents:
Before sending out your documents, you can have them specifically approved by someone from your legal team by clicking Legal Approval. (find out more about legal approval here)
3. You have a Growth or Leader subscription:
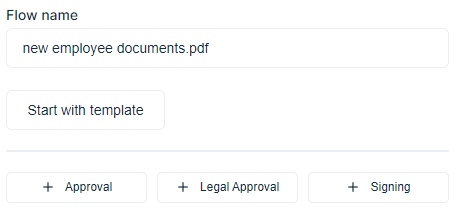
Users in the Growth or Leader tier can start with a template or with an empty flow.
Click here to find out more about the use of flow templates.
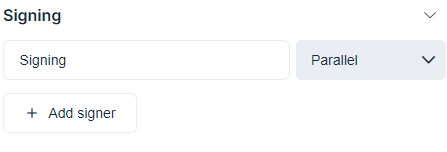
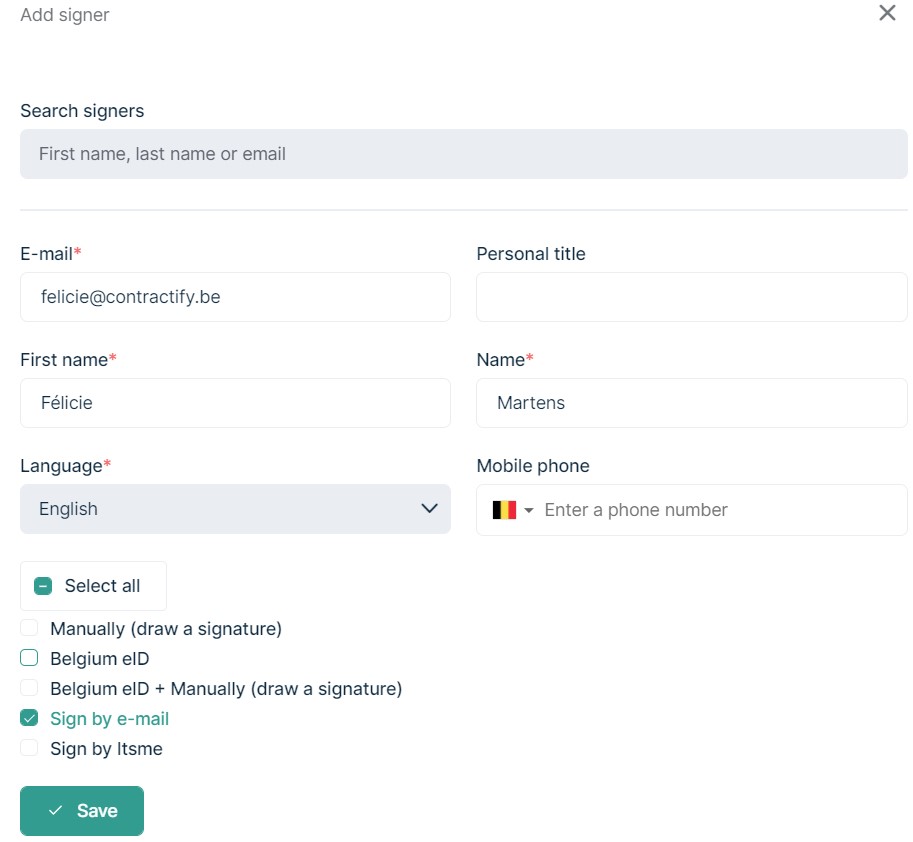
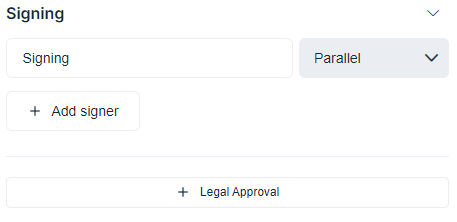
Click on + Signing / + Add signer to select the people who need to sign the documents.
Fill in the details of the signers and select which signing method they can use.
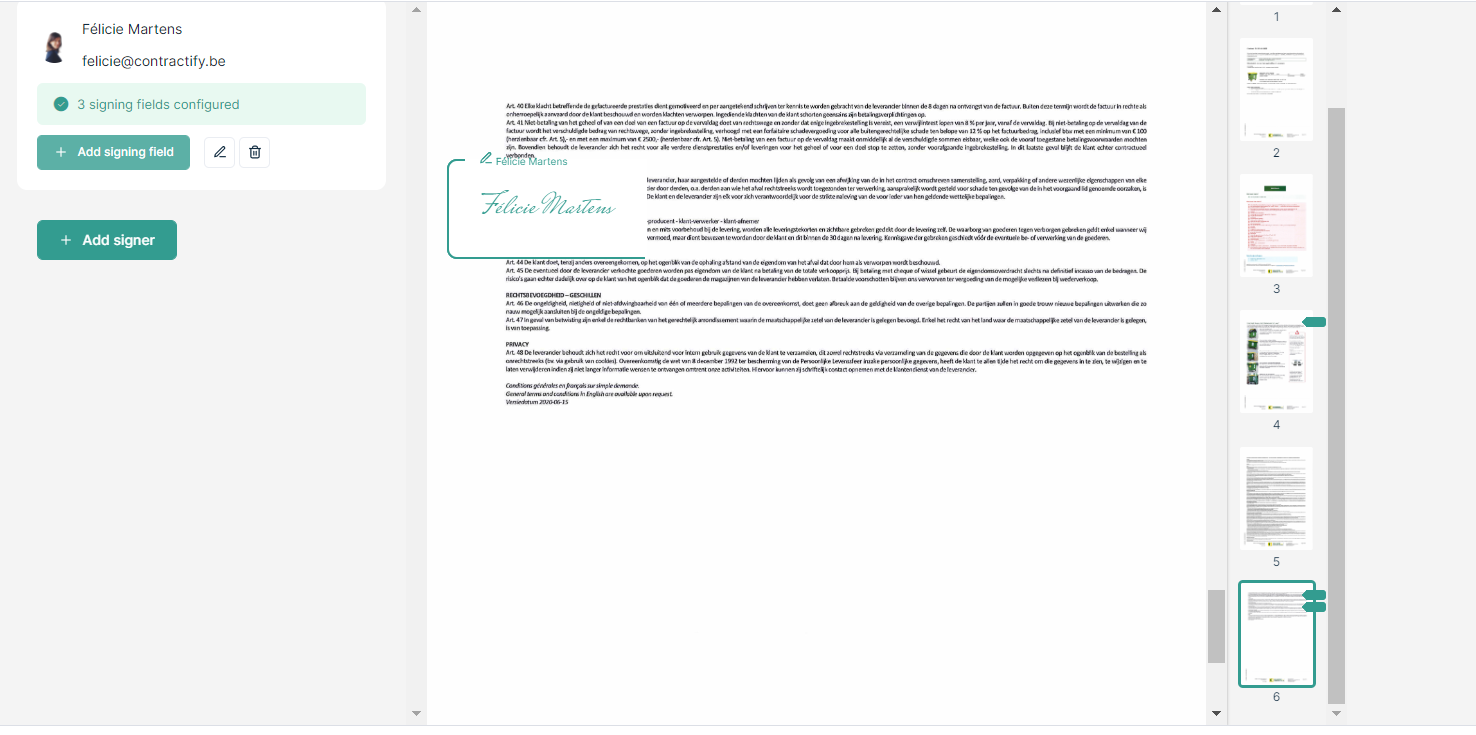
In the column on the right of the document preview, click on the page where you want to add a signature.
Click on “+ Add signing field” and drag the signature box to the right position on the page.
Repeat per signature and per signer.
You can easily remove a signature by closing the signature box.
Once all of the signers are added and the signatures are placed in the right position, go to the top right corner of the page and click on the drop down arrow to configure the signing process for the other documents in the flow, if necessary.
Click on Start flow in the bottom right corner of the page to send your document(s).
OR click on Save as draft to send your document(s) later.


Hier vind je alle informatie over de e-signing module.